Getting started with Arduino UNO R4 WIFI
This guide provides step-by-step instructions to build your first Zephyr application targeting the Arduino UNO R4 WiFi board.
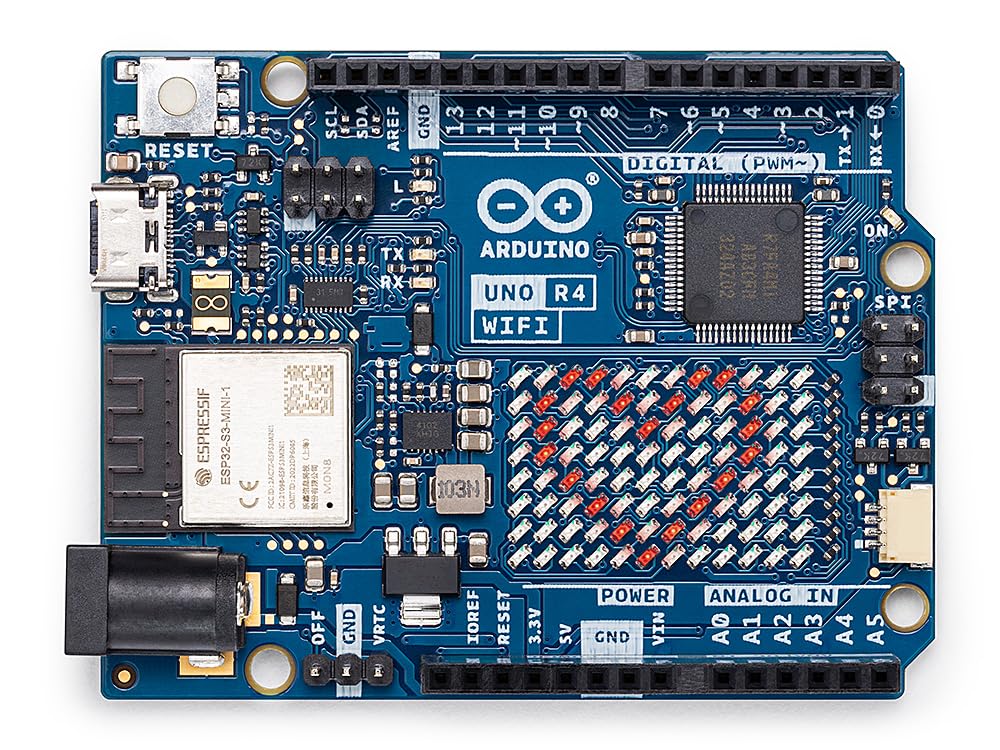
The Arduino UNO R4 WiFi is a development board featuring the Renesas RA4M1 SoC with a 32-bit ARM Cortex-M4 in the Arduino form factor and is compatible with traditional Arduino.
- Vendor: Arduino
- Architecture: arm
- SoC: r7fa4m1ab3cfm
Installation
Please follow the Installation guide.
Import a SDK
Import a minimal SDK for ARM target.
- Click on "Import SDK" or "Add Zephyr SDK" button
- Open the newly opened page, enter information about your Zephyr SDK.
- For example:
- Source location: Official SDK
- SDK Type: Minimal
- Version: v0.17.0
- Toolchains: arm
- Location: enter the parent location where to import the Zephyr SDK (eg.
path/to/sdk/arm-zephyr-sdk-0.17.0)
- For example:
- Click on the "Import" button
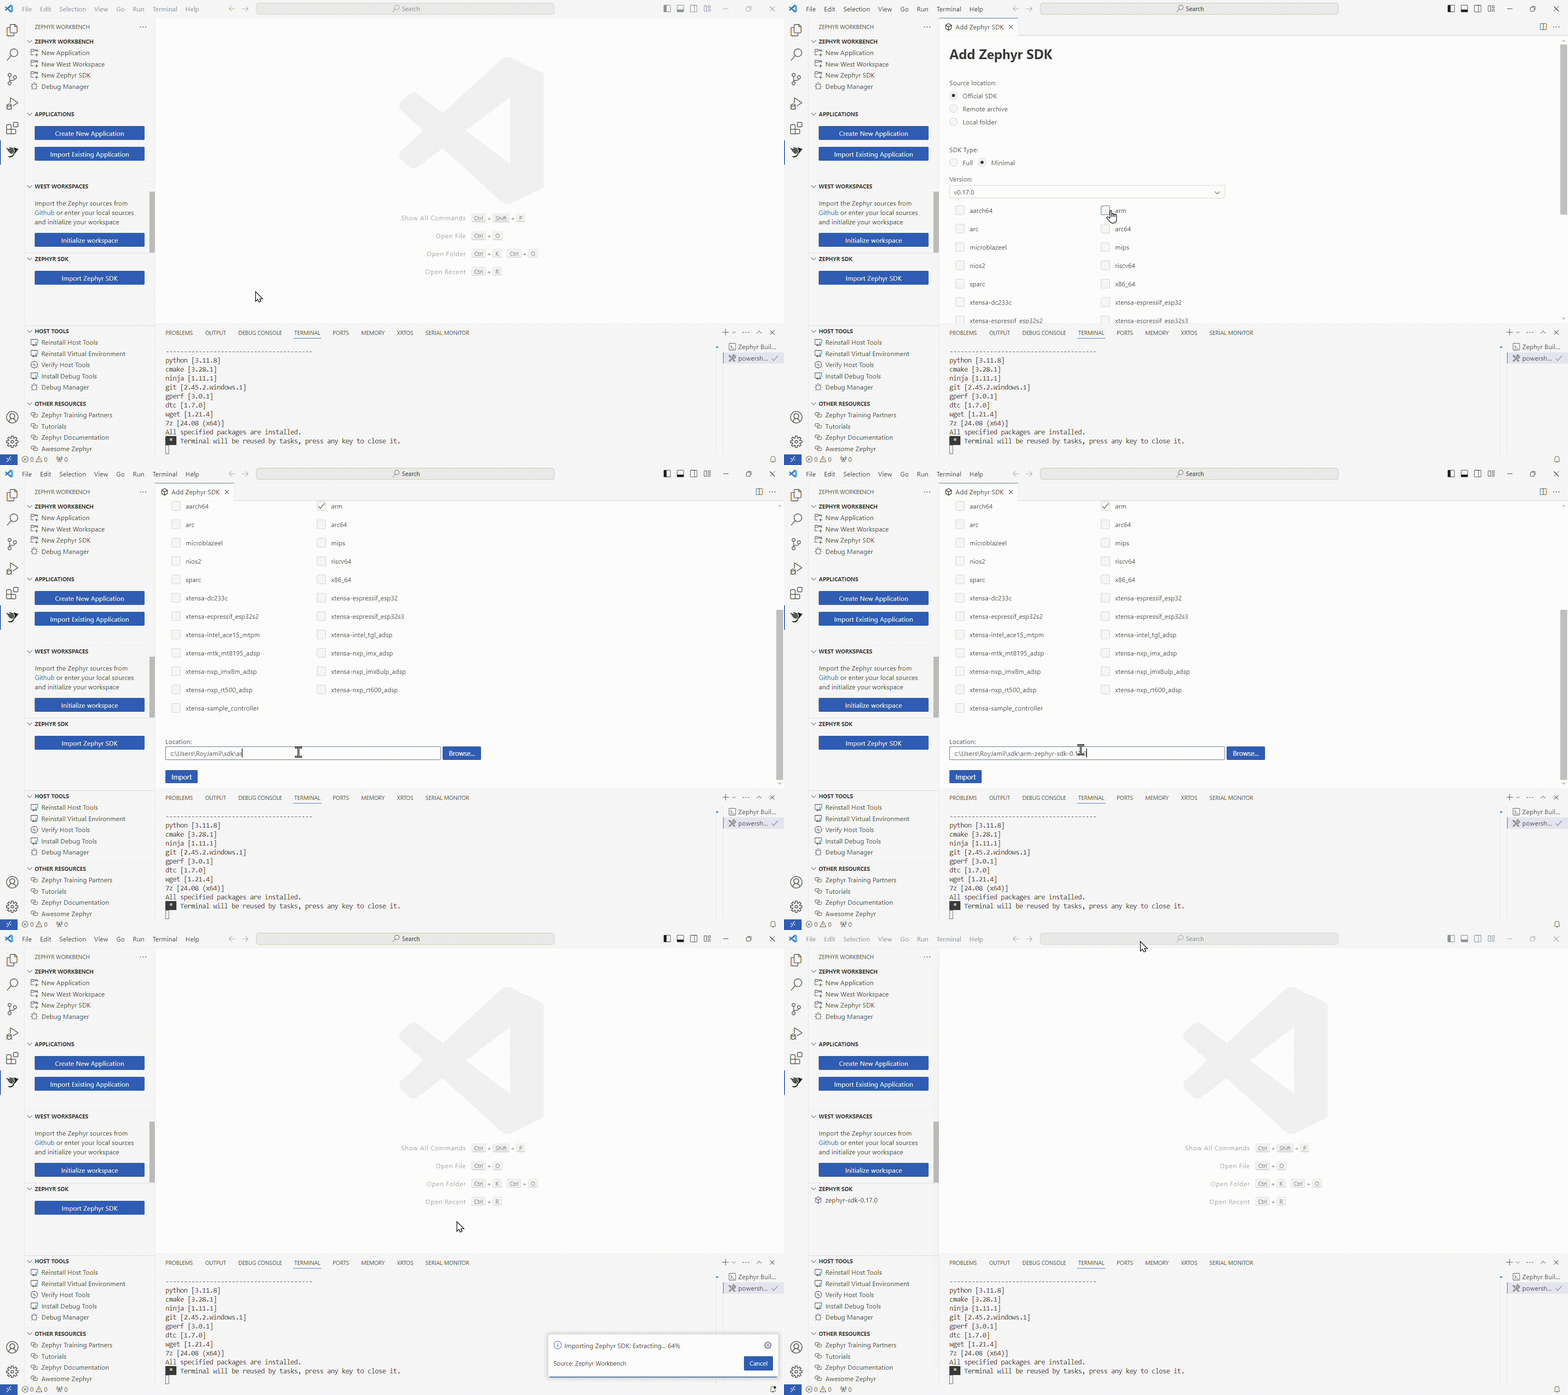
After the SDK is download and installed, it is listed in the ZEPHYR SDK view.
Import Renesas minimal west workspace
Import a minimal west workspace for NXP.
- Click on "Initialize workspace" or "New West Workspace" button
- Open the newly opened page, enter information about your west workspace instance.
- For example:
- Source location: Minimal from template
- Path: https://github.com/zephyrproject
- Template: Renesas
- Branch: v4.0.0
- Location: enter the directory where the west workspace will be imported
(the directory name will serve as workspace name, eg.
path/to/workspace/renesas-zephyr-v4.0.0). (it takes several minutes to init then update the workspace)
- For example:
- Click on "Import"
After the Workspace is download and installed, it is listed in the WEST WORKSPACES view.
Create a new blinky project
Now we are going to create a blinky project for the Arduino Uno R4 WiFi board.
- Click on "Create New Application"
- Select the West Workspace previously init
- Select the Zephyr SDK previously imported
- Select
Arduino Uno R4 WiFias the target Board - Select
blinkyas Sample project - Keep
blinkyas the project name or change it - Enter the project location
- Select the Pristine Build option (More information on Pristine Builds)
- Click on "Create"
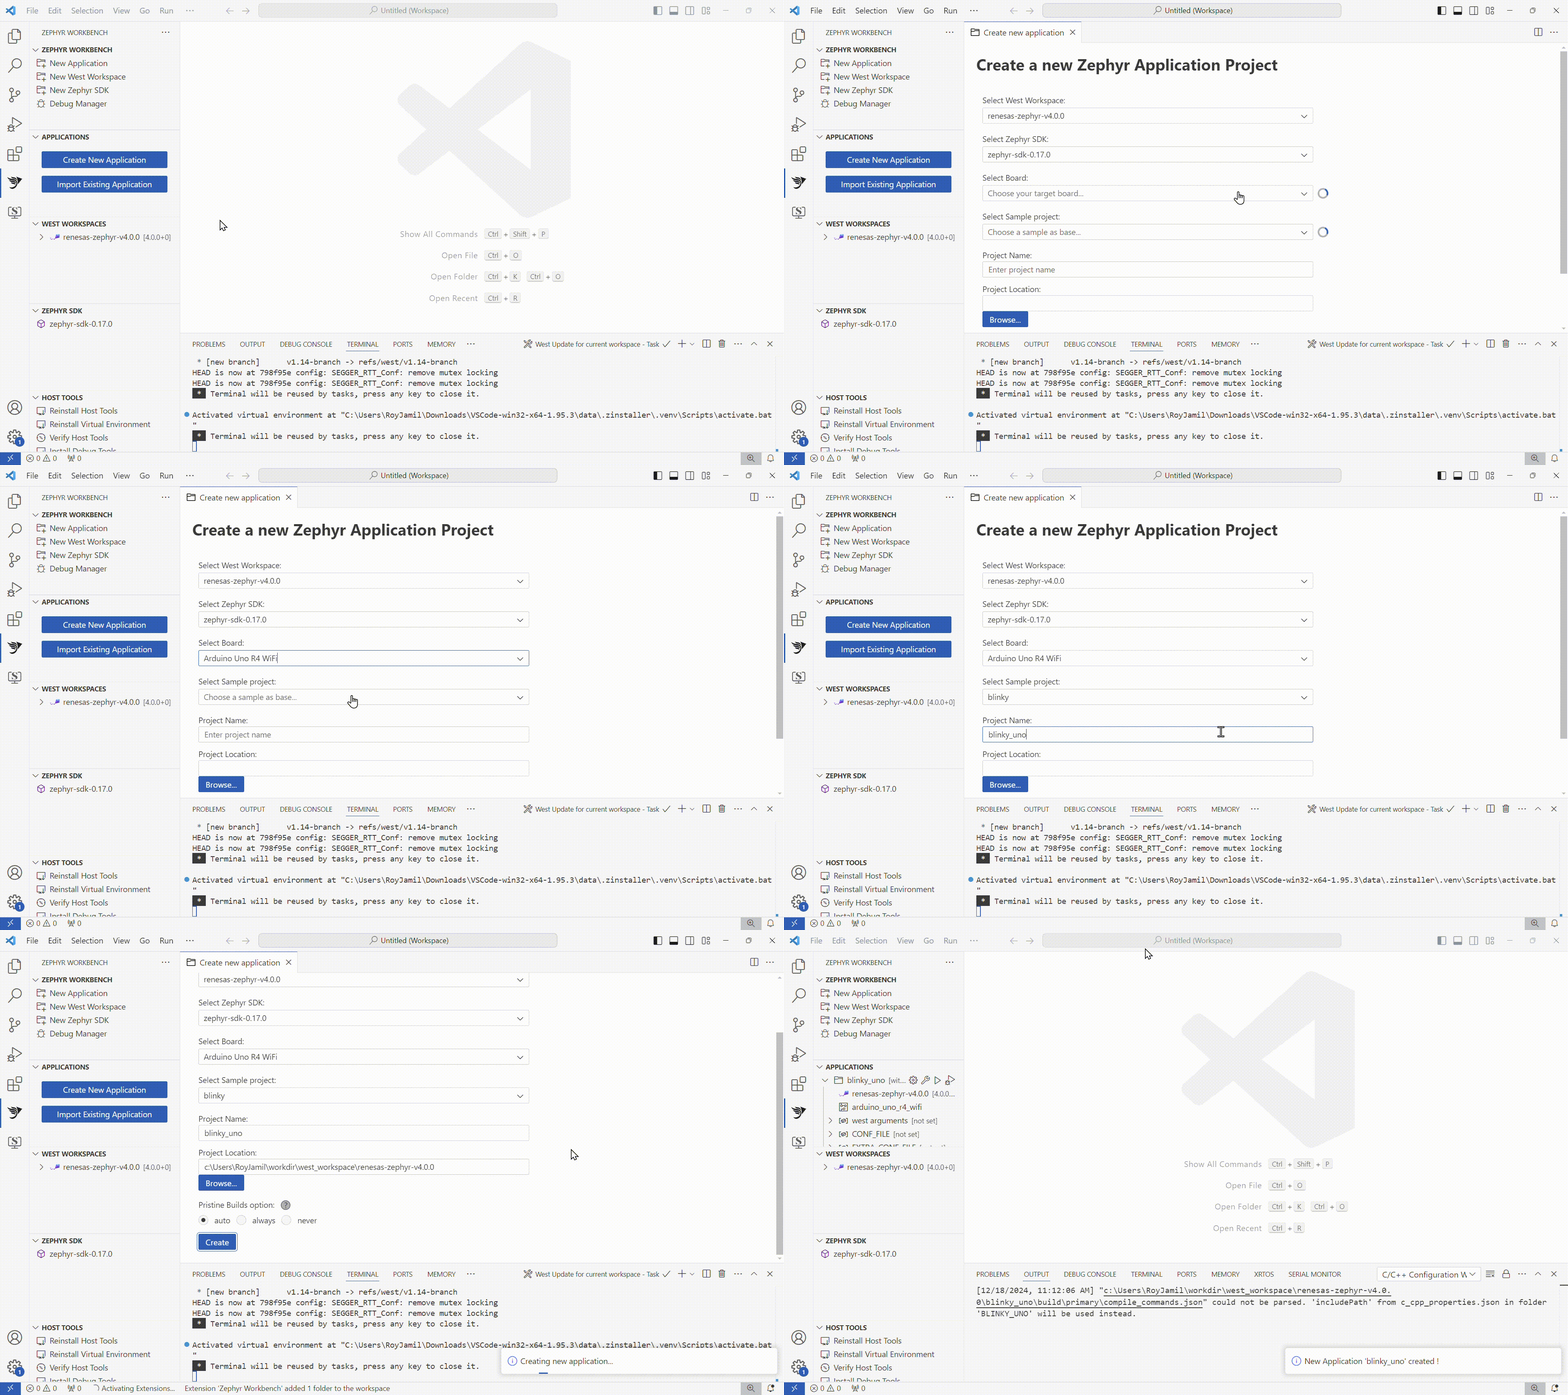
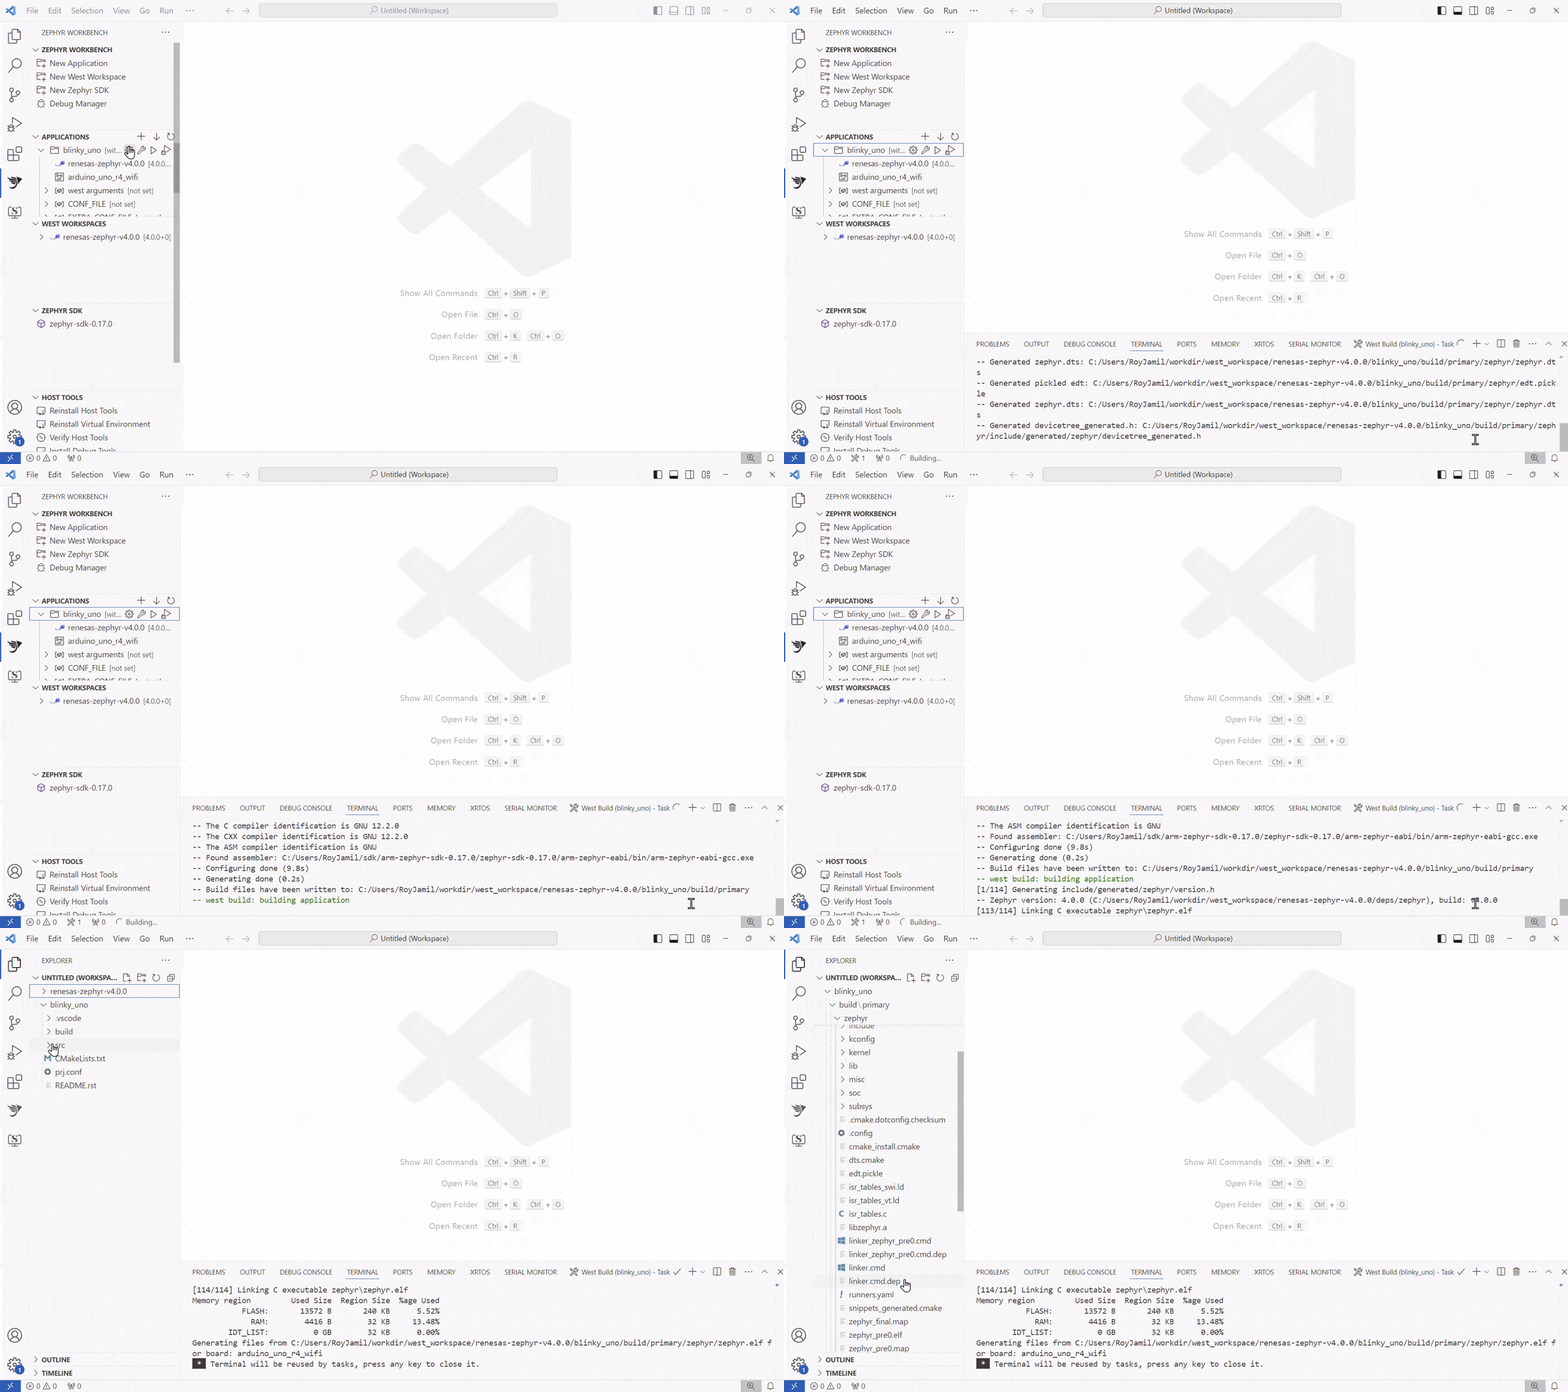
When the project creation is done, it appears on the APPLICATIONS view.
To build the project, right-click on it, then select "Build". The build output is displayed in the Terminal.
Flash and Debug project
Arduino UNO R4 WiFi has a built-in debug adapter that you can use for flashing and debugging. It is compatible the following runners:
- pyOCD
pyOCD is provided with Zephyr Workbench, unlike other runners. Zephyr Workbench can automatically detect the executable. Otherwise, either edit the PATH environment variable to with the path to the executable or inform the runner path in the Debug Manager.
Connect your machine with the Arduino Uno R4 WiFi on the USB-C connector.
- Open the "Debug Manager"
- Select the
blinkyapplication (The page takes several second to auto-complete). The build configuration should beprimary. - Select
pyOCDas runner ("Runner executable found" should be displayed if the probe software is installed on your system) - If the runner is not found, enter the path to it executable.
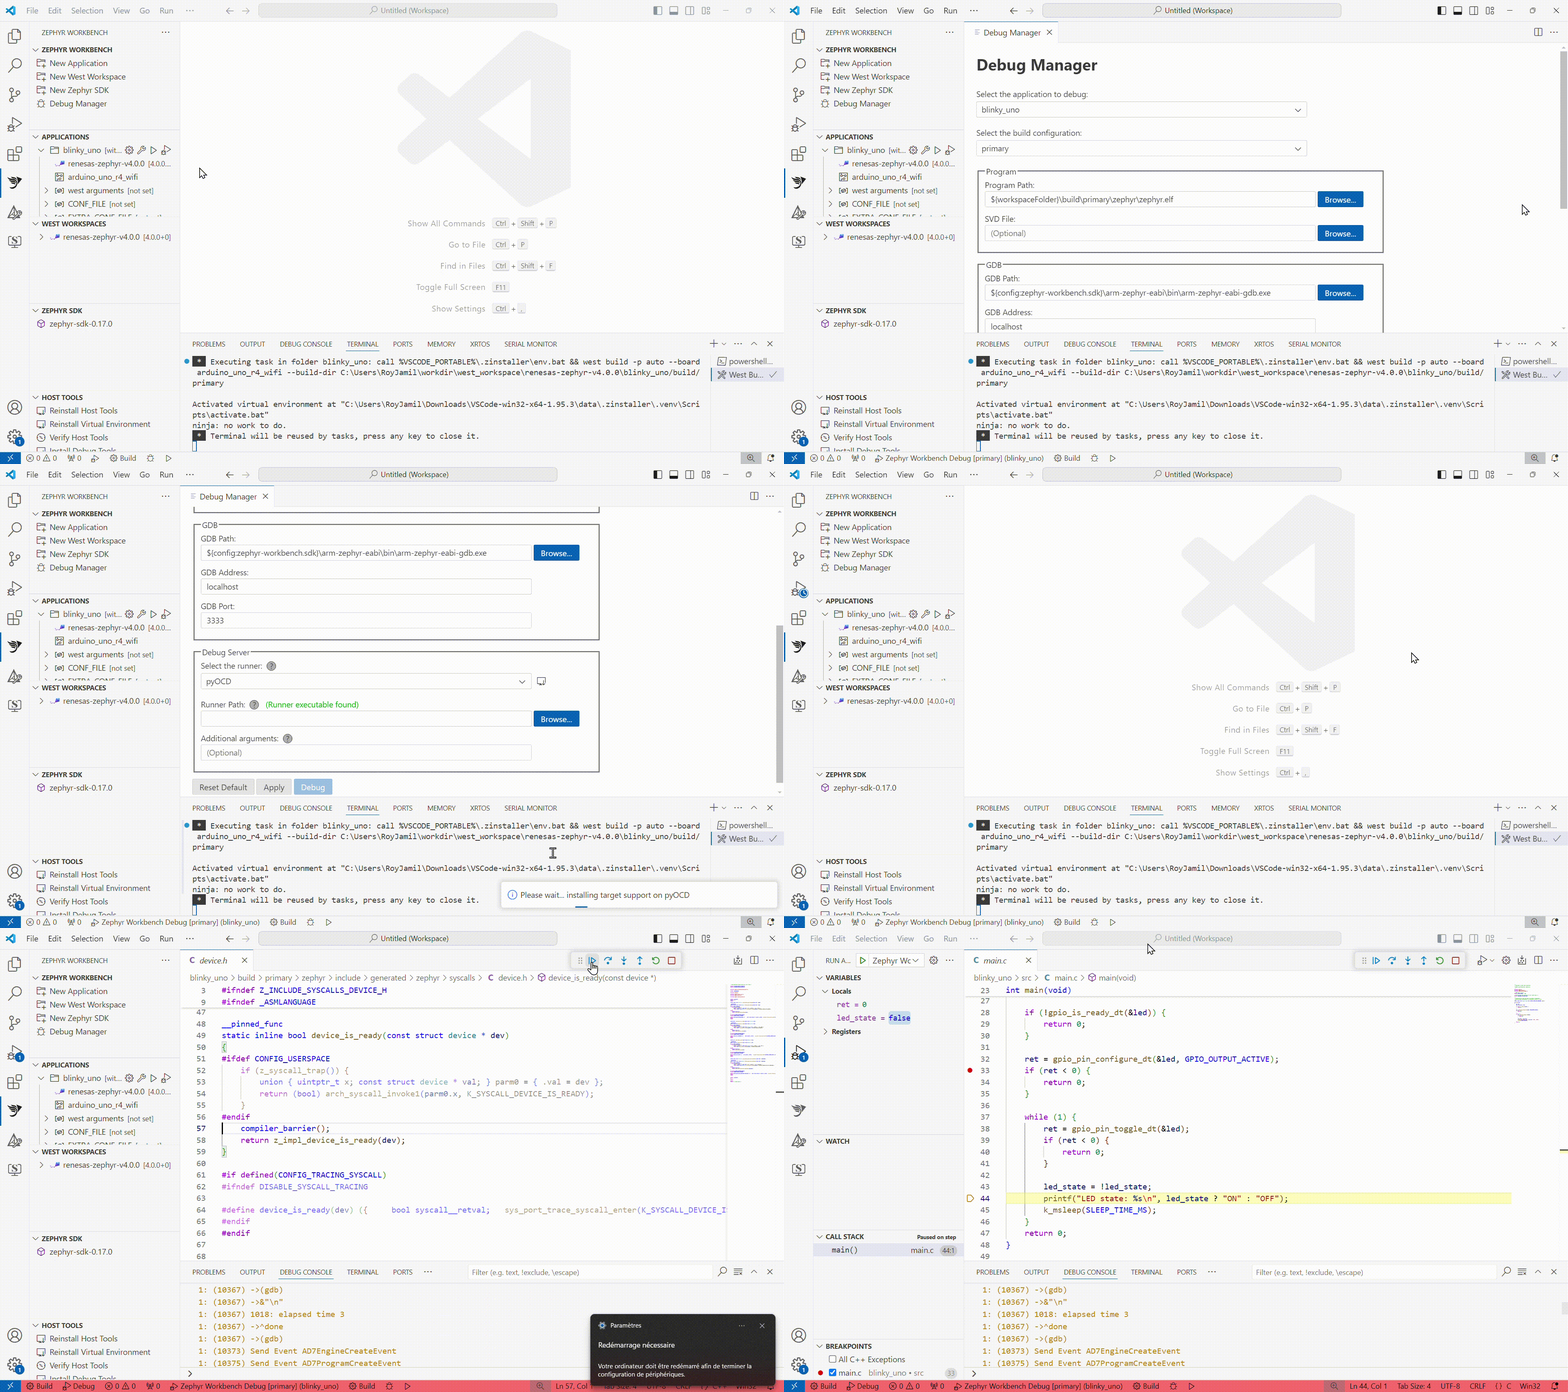
- Click on "Apply" to save the debug configuration.
- Click on "Debug" to start the debug session.
If it is the first time you debug an application for the board with pyOCD on Zephyr Workbench, the start debug process might takes longer to check if pyOCD supports the "r7fa4m1ab" target or needs to install it. This step is done automatically.
Restoring Arduino Bootloader
If you accidentally corrupt the Arduino bootloader, you can recover it with the following command:
wget https://raw.githubusercontent.com/arduino/ArduinoCore-renesas/main/bootloaders/UNO_R4/dfu_wifi.hex
pyocd flash -e sector -a 0x0 -t r7fa4m1ab dfu_wifi.hex