Getting started with ESP32-DevKitC-WROVER
This page objective is to guide you step by step on how to create your first Zephyr application on the ESP32-DevKitC-WROVER. The following steps cover the creation of a Hello world application in Simple boot mode (single binary image without 2nd stage bootloader).
ESP32-DevKitC is a low-footprint and entry-level development board that is part of the ESP32 series.
- Vendor: Espressif Systems
- Architecture: xtensa
- SoC: esp32

Installation
Please follow the Installation guide.
Import a SDK
Import a Zephyr SDK with every toolchains.
- Click on "Import SDK" or "Add Zephyr SDK" button
- Open the newly opened page, enter information about your Zephyr SDK.
- For example:
- Source location: Official SDK
- SDK Type: Full
- Version: v0.17.0
- Location: enter the parent location where to import the Zephyr SDK (eg.
path/to/sdk/zephyr-sdk-0.17.0)
- For example:
- Click on "Import"
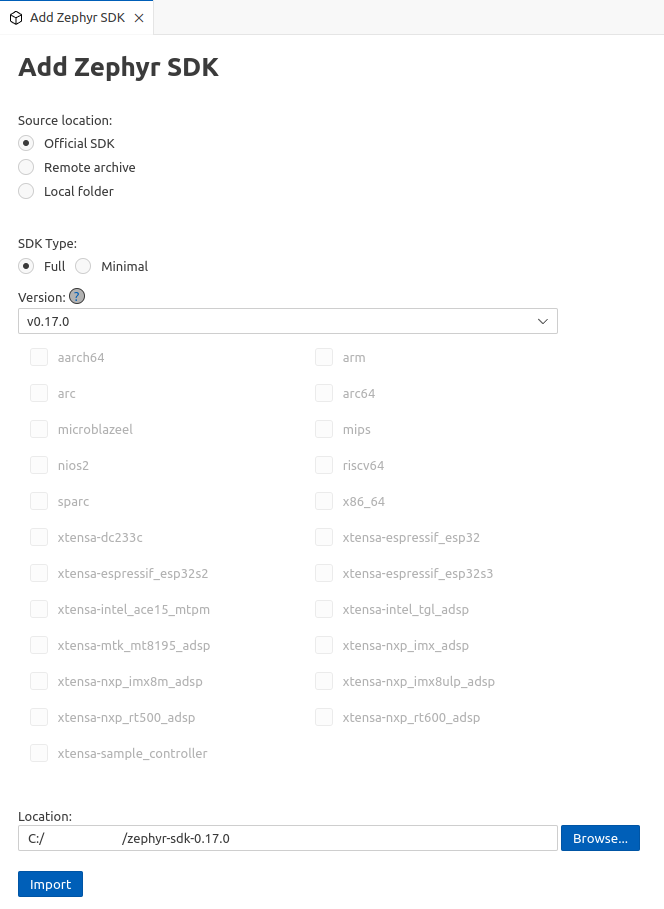
After the SDK is download and installed, it is listed in the ZEPHYR SDK view.
Import west workspace
Import the full west workspace.
- Click on "Initialize workspace" or "New West Workspace" button
- Open the newly opened page, enter information about your west workspace instance.
- For example:
- Source location: Repository
- Path: https://github.com/zephyrproject/zephyr
- Tag: v4.0.0
- Location: enter the directory where the west workspace will be imported
(the directory name will serve as workspace name, eg.
path/to/workspace/zephyr-v4.0.0). (it takes several minutes to init then update the workspace)
- For example:
- Click on "Import"
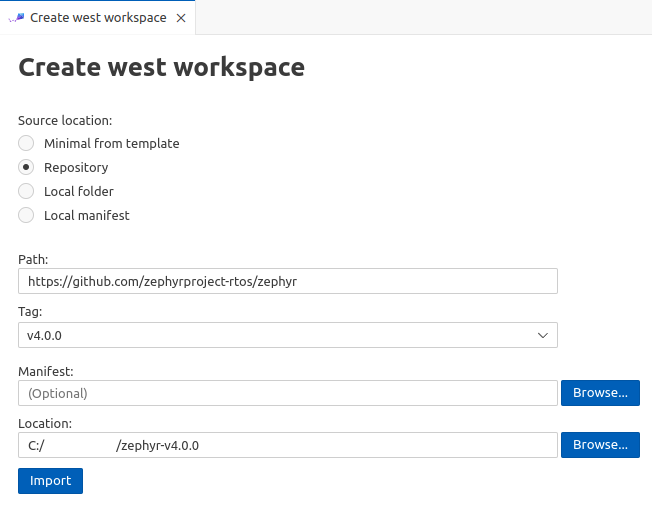
After the Workspace is download and installed, it is listed in the WEST WORKSPACES view.
Create a new hello_world project
The environment set up complete. We are now going to create a hello_world project for the ESP32-DevKitC-WROVER board.
- Click on "Create New Application"
- Select the West Workspace previously init
- Select the Zephyr SDK previously imported
- Select
ESP32-DevkitC-WROVER-E PROCPUas the target Board - Select
hello_worldas Sample project - Keep
hello_worldas the project name or change it - Enter the project location
- Select the Pristine Build option (More information on Pristine Builds)
- Click on "Create"
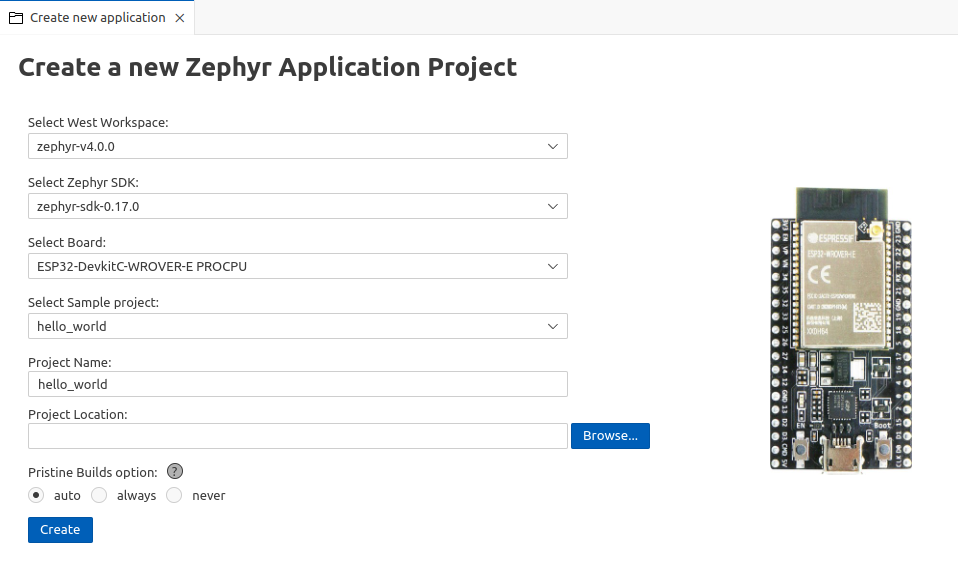
When the project creation is done, it appears on the APPLICATIONS view.
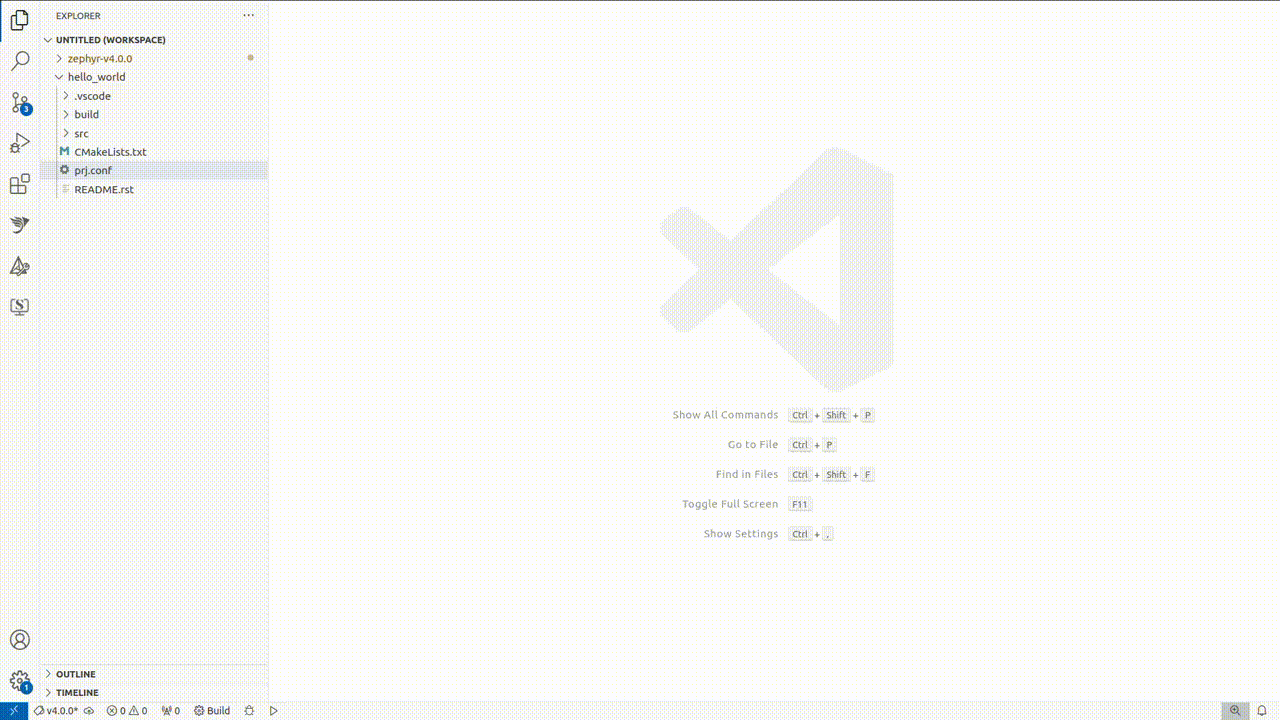
In some case, you might need to edit the prj.conf to enable HEX file generation (required for flashing the program) and/or unsupported revision (if you use older chip).
CONFIG_ESP32_USE_UNSUPPORTED_REVISION=y
CONFIG_BUILD_OUTPUT_HEX=y
This example covers simple boot mode (without 2nd stage bootloader). You might need to configure the project to support MCUboot or Sysbuild.
To build the project, right-click on it, then select "Build". The build output is displayed in the Terminal.
Flash project
ESP32-DevKitC-WROVER flashing process use esptool.py and data are transferred on serial port. Ensure the ESP32 serial port is not busy before flashing.
To flash the application, right-click on the project > Run, then select --runner esp32.
The ESP32-DevKitC-WROVER has a CP210x USB to UART Bridge. If device driver does not install automatically, you can download it from Silicon Labs website.
Debug project
(Coming soon...)