Applications
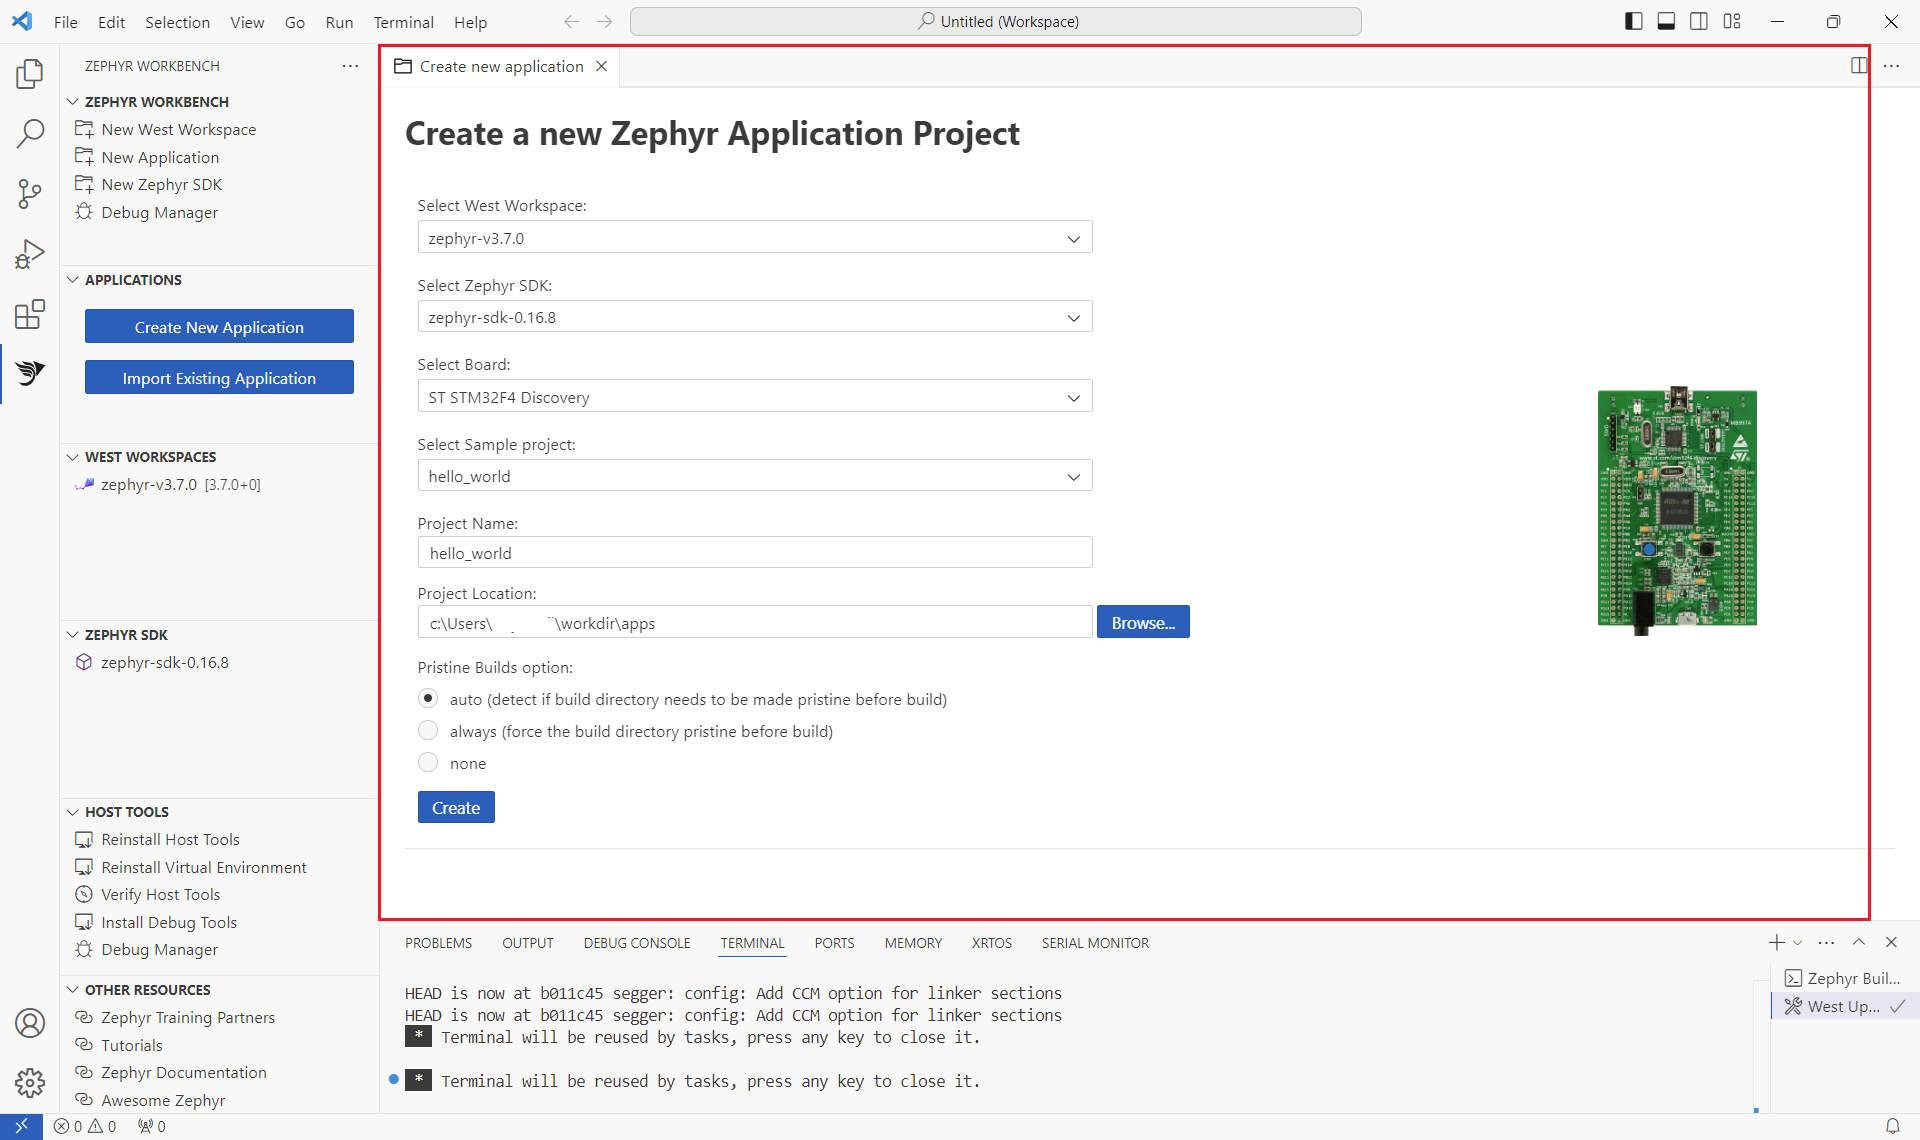
Create New Application
Before creating an application, it is mandatory to have a Zephyr SDK and a West workspace. The creation process is based on sample provided by Zephyr.

- Click on "New Application"
- Select a parent west workspace, the workspace folder is scanned to detect the available boards and samples
- Select a SDK (if your use a minimal SDK, not every boards are compatible)
- Select the target board
- Select the sample that serve as base project
- Enter your project name
- Enter your project location
- Select the pristine build mode (this option indicated if the build folder must be clean before each build)
- Click on "Import"
Import Application
If you already have an application sources, you can import and configure it for Zephyr Workbench
-
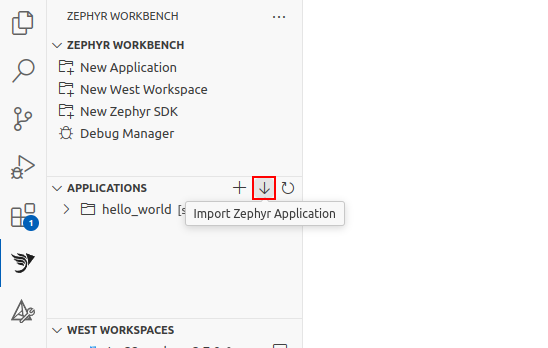
Click on "Import Application" button

-
Enter the application directory or click on the folder icon to open file browser

-
Select the west workspace to attach your application to
-
Select SDK to use
-
Select the target board
Application structure
The application consists at least on:
application
├── src               // Source directory
├── CMakeLists.txt    // Link the application to the Zephyr's CMake build system
├── prj.conf          // KConfig fragment
└── build             // Build directory (generated)
Other optional files and overlay can be added. For more information, refer to the Zephyr Application Development.
Build Application
To build from the "Applications" panel
- Right-click on your project > Build
- or
- Click on the build button right next to the project
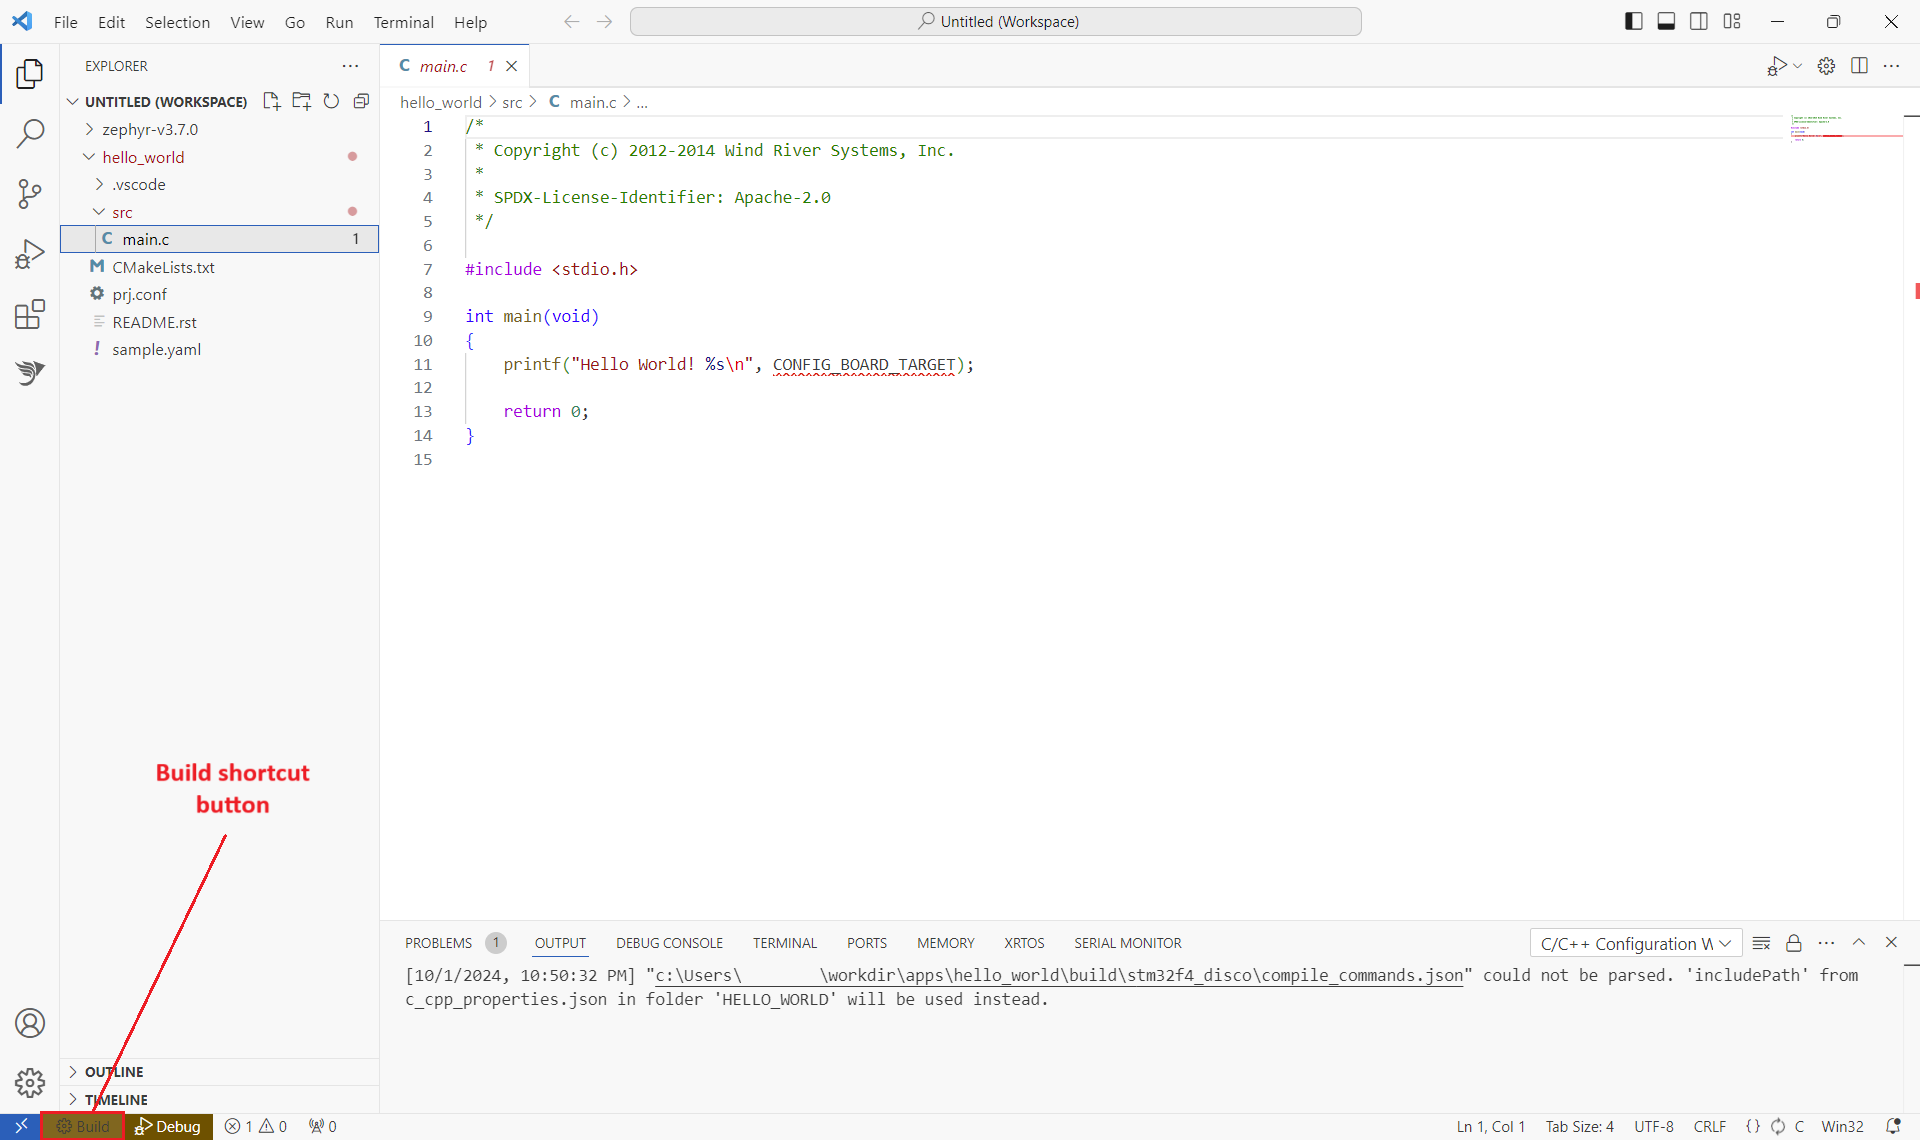
On the "Explorer" view, if a source file of your project is opened in the editor, a Build shortcut button is displayed in the status bar on the bottom.

Manage Application
After creating or importing an Application, it appears in the APPLICATIONS panel on the left. The folder is also added to your VS Code multi-root workspace an you can open the code editor from the "Explorer" view.
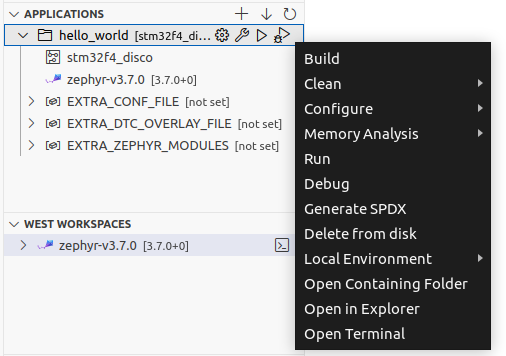
In the APPLICATIONS panel, you can:
- Build
- Clean
- Rebuild/ Pristine: Fully clean the items from the build folder then build the project.
- Delete Build: Delete the build directory.
- Ninja clean: Delete the objects and binary only.
- Configure
- GUI Config: Open the Gui Config in new window to configure the Zephyr kernel.
- Menuconfig: Open the Menuconfig in terminal to configure the Zephyr kernel.
- Harden Config: Run config hardening tools.
- Change Board.
- Change West Workspace: Associate the Application to another west workspace.
- Change Build Pristine Setting.
- Memory Analysis
- RAM Report: List compiled object and their RAM usage.
- ROM Report: List compiled object and their ROM usage.
- Puncover: Start puncover webserver, page displayed in web navigator.
- Run
- Debug: Search for existing debug session or open Debug Manager.
- Generate SPDX: Generate SPDX 2.3 tag-value document.
- Delete from disk: Fully delete the application folder from the system (irreversible).
- Local Environment
- Create local Python Virtual environment: Generate a venv for the application only.
- Set Python virtual environment: Set your own venv, enter the path to the activate script.
- Open Containing folder: Open the application folder on your File Explorer.
- Open in Explorer: Open the folder in the "Explorer" view.
- Open Terminal: Open a local terminal for the application.

Additionally, you can set some Zephyr Build System Variables:
- EXTRA_CONF_FILE: Additional Kconfig configuration fragment files.
- EXTRA_DTC_OVERLAY_FILE: Additional devicetree overlay files.
- EXTRA_ZEPHYR_MODULES: Absolute paths to the additional modules.
- SHIELD: Select from available shields.
Click on the [+] icon to add a value.
You can also set:
- WEST ARGUMENTS: Additional argument to west build command (affect the tasks.json)
The environment variable values and west arguments are stored in the application/.vscode/settings.json
of your west workspace folder. West arguments can be used to enable Sysbuild by adding --sysbuild in
value.